Followers

Monday, 3 December 2012

Christmas Cards

A few weeks ago I showed a sheet of images (featuring a pair of Christmas Owls) that were to be used as Christmas Cards.

Over the last couple of weeks I have been trying to play catch-up in making the cards for friends/family, and I think I am winning :)

Here are a couple of examples...
Featuring an Owl stamp (coloured with ProMarkers)  from Little Claire Designs

Featuring the Christmas Stamp from Imagination Crafts (coloured with ProMarkers) and free papers that were with various magazines

Featuring the Polar Bear (free with a magazine last Christmas; also coloured with ProMarkers) & a Little Claire Designs sentiment

Saturday, 1 December 2012

How To... Create a Gift Card Holder (2012)

Last year I created a number of Gift Card Envelopes as Christmas Gifts.  This year I wanted to do the same but with a different design.

After looking around on the Internet at various tutorial videos I came up with an idea, it was not based on any one video, but used ideas from a selection of sources.

Here is a sneak peak at the finished Holder - this one is decorated for Christmas, but you could use any colours with any decoration (the possibilities are endless)...


So here is my latest How To... brought to you in pictures. 
Beware: This is a post with lots of pictures!

To create this holder I have used the Spellbinders 'Labels Seventeen' dies, in particular the largest size.

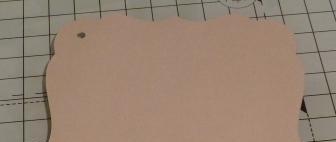
Cut out 2 shapes in card stock, I used a double sided card stock (with the red strips on the front & a cream colour on the back).
You will then need to cut a 1/2 size shape to form the pocket.  As I wanted to pick the patten part of the paper, I used a Post-It note placed over the die to keep it in place while I added the 'C' plate & wound it through my Cuttlebug (many thanks to Dawn Griffith's Videos for this idea).

Trim this part piece so that it is only 1/2 the height of the full die.

Put both full pieces together & punch a hole in the top left corner - this needs to be the correct size to fit an eyelet through.

Now it is time to glue the pocket in place, I did several attempts with different types of glue and in the end I found that Pinflare worked the best.  I did not squash the pocket down completely, but left bit of height to the glue.  This then gave me the ability to easily slip the Gift Card into the pocket.

 Place the Pocket into the glue & set aside to dry.

While the pocket is trying you can decorate the front of the holder.  For this one I added a Christmas Tree created using the Sizzix Stamp & Die set.  I also added a simple Happy Christmas sentiment.

Once the glue on the pocket was dry I put the front & back together & fixed a eyelet in place to hold them together - Don't crimp it too tight as you want to be able to twist the front & back round.

With the front twisted round you can access the pocket for the gift card.  Alternatively you could create a fold and use the eyelet like a hinge.

 I ended up making 15 in one session (taking about 2 hours) here are a few examples.


Friday, 30 November 2012

New Goodies...

My order arrived yesterday from Ginny (the Stampin' Up Demonstrator) after the Demo evening last Wednesday.

As it fitted with both of us, Ginny delivered the goodies to me at work :)  The down side of this was that I was sat trying to work at my desk, while thinking about what was sat in my car... maybe not a good combination LOL.

So... I decided to use 2 hours of Lieu time and head off home early!!!

I decided to lay all of my new goodies out on the desk & take a picture to share with you all, however I had one problem... I could not see enough space on my desk to put all of the Goodies!!!  This meant that I had to have a clear up (which was really needed!).

Here are all of my Goodies, including: 1 Paper Pack; 2 Stamp Sets; 1 Butterfly Punch; 1 Ink Pad; 1 pack of paper peircing guides (I can't remember the real name for them) Dimensionals & a glue rubber.

The one I am most looking foward to playing with is the 'Lovely As a Tree' stamp set, but in the end I did not get time to start using them this afternoon :(


I already have another shopping list on the go for bits that I want to get, but they will have to wait a few months. I know that the Stampin' Up stuff is not cheap, but the quality of anything I have brought from them is great!!!!

Thursday, 22 November 2012

Stampin' Up Evening

Following on from yesterday's WOYWW post we had a great evening with Stampin' Up Demonstrator Ginny Beard.

Due to a lack of space in the conservatory I asked Ginny for a Demonstration using the Stampin' Up Products (rather than a Make & Take event). I must say a very big Thank You to Ginny, her Demos were great and I think we all came away with more ideas for Cards & Projects.

It was a bit of a squash but we all fit into the conservatory :)

This was Ginny's First Demo and when the Gift Holder was completed she filled it with Chocolate Eclairs & gave it to me as a gift :)
Delta & Jumanji also made an appearance during the evening, comming into the house for a quick visit - well that was until Delta decided to discrace himself and poo on the carpet (guess who had to clean it up though!!).  We do say that we have the best spot cleaned carpet in Lincolnshire!!

Wednesday, 21 November 2012

WOYWW - 21 November 2012

Once again it is Wednesday... where have the last 2 weeks gone????

So it is of to Stamping Ground for the weekly Whats On Your Workdesk Wednesday, this week will be a very quick post as I have been cleaning like mad.
So why have I taken a picture of a very empty conservatory??  Well later this evening I have booked a Stampin' Up Demonstration, here at my house.  So 7 friends will be visiting for a craft evening.

I already have my shopping list written out, but I am sure there might be a few last minute additions!!

Happy WOYWW.

Thursday, 8 November 2012

Opps

We travelled back on the Ferry from Denmark to the UK during Tuesday evinging, arriving in Harwich at 12:30pm yesterday. When we went down to the car deck to start our drive home we found this mess...

The car parked in front of us had not used his Handbrake and during the rough crossing (winds gusting Force 9!!) his car had slide into the one to the right of us and the car to the right of him. Luckly our car was undamaged :)
Opps

Saturday, 3 November 2012

Spiderman Birthday Card

This card was created using a Kanban Spiderman - Wall Crawler kit (ref No CON9043), I can't remember where I found it but I just HAD to have one for my Nephew's birthday card.


It was very easy to make, with Spiderman being made up of 4 layers.

Also with the card was a 2nd sheet of Spiderman elements, these will be used to create Table Place Holders on the day of his party (I hope to add photos later) and will complement the Spiderman Plates, Cups & Napkins... well it just had to be done!

Happy Birthday "L"