This weekend I have been home alone as DH is back in hospital again. This time it is good news as they have operated and all of the Kidney stones are now gone. He should be back home again in the next couple of days.
Well... while he was away I went to the Sincerely Yours Show at Lincoln on Sunday. I was really very good and managed to keep to my shopping list (well nearly!!) - However when I got home I decided that before I got out all of my new goodies, I really need to have a tidy and sort to make some room.
So after a while I ended up with a pile of craft staff (some of it brand new and never used) that had been sitting around for ages. I decided to put most of these bits on eBay, after all it will mean that I have a bit more money to buy more crafty stuff :)
If you want to have a look what I found and give any of it a new home please feel free to have a look at my eBay shop (which can be found HERE).
Happy Crafting :)

This Blog all about Me... including Scrapbooking, Crafts, & Owls.
Monday, 27 May 2013
Thursday, 23 May 2013
LiM - Dogs
This week for Less is More the topic is...
This week is theme week at Less Is More and we hope you enjoy the choice. We know you will come up with some fabulous creations. We want to see cards with
This week is theme week at Less Is More and we hope you enjoy the choice. We know you will come up with some fabulous creations. We want to see cards with
Cats and/or Dogs
We want to see cards with your favourite pet or both. We know you will all use your imagination. Here are our cards for this week.
I ended up creating 2 cards, 1 with a Cat and the other with a Dog. So here is the 2nd post featuring the Dog...
 |
| Using a Little Claire Design topper and red/white bakers twine. The Hello sentiment is from Lily of the Valley stamp set. |
LiM - Cats
This week for Less is More the topic is...
This week is theme week at Less Is More and we hope you enjoy the choice. We know you will come up with some fabulous creations. We want to see cards with
This week is theme week at Less Is More and we hope you enjoy the choice. We know you will come up with some fabulous creations. We want to see cards with
Cats and/or Dogs
We want to see cards with your favourite pet or both. We know you will all use your imagination. Here are our cards for this week.
I ended up creating 2 cards, 1 with a Cat and the other with a Dog. So here is the Cat first...
 |
| The image was from a paper stack free with a magazine, coloured with my ProMarkers. |
Thursday, 16 May 2013
A-Z of Me
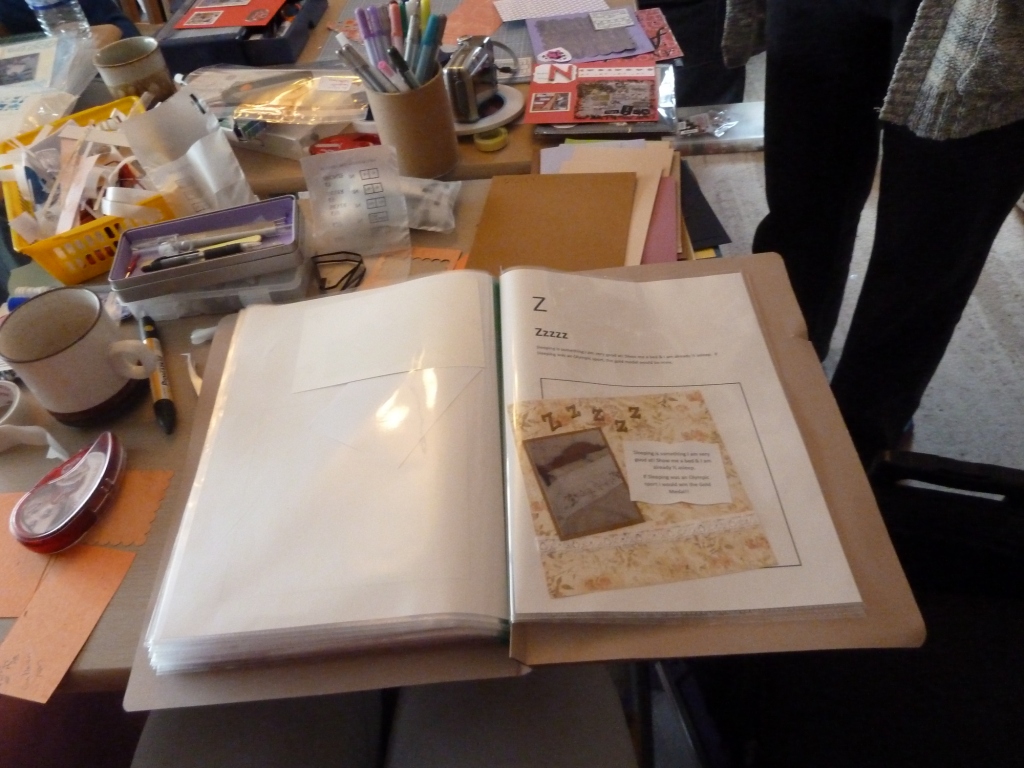
As I mentioned in a previous blog post (which can be seen HERE) I had completed the pages of a 6x6" album titled "A - Z of Me".
Although 26 layouts were hard work to plan, part of me did enjoy it. When it came to putting the layouts together I did not really think that I would be able to complete all 26 in 1 day, but I did!
All in all I am pleased with the album and have a couple of layouts that are really special & I love so much, see the bottom of this post to find out which ones :)
My layouts will be going with all of the other A-Z albums to a crop on Saturday, those attending will get chance to vote for their favorite. I will let you know how my album gets on.
In the mean time I did promise to post the photos of the finished 12x12" pages (with 4 smaller pages to each 12x12 page). I completed the title page and the last page last night so here they are hot off the press.
My special layouts are:
Although 26 layouts were hard work to plan, part of me did enjoy it. When it came to putting the layouts together I did not really think that I would be able to complete all 26 in 1 day, but I did!
All in all I am pleased with the album and have a couple of layouts that are really special & I love so much, see the bottom of this post to find out which ones :)
My layouts will be going with all of the other A-Z albums to a crop on Saturday, those attending will get chance to vote for their favorite. I will let you know how my album gets on.
In the mean time I did promise to post the photos of the finished 12x12" pages (with 4 smaller pages to each 12x12 page). I completed the title page and the last page last night so here they are hot off the press.
 |
| Page 1 |
 |
| Page 2 |
 |
| Page 3 |
 |
| Page 4 |
 |
| Page 5 |
 |
| Page 6 |
 |
| Page 7 |
 |
| Page 8 |
- Anxiety - When I look back at how I was 20-25 years ago I would not have believed how my life was going to turn out
- Ufo - It took several attempts to get the journalling right, but I love the look of this page
- You Are To Me - DH asked if he could write the words to describe what I mean to him, I did mean to get him to sign the journalling
Tuesday, 14 May 2013
1 Stamp, but 2 very different cards
To see how it came out I stamped 2 images, the first in Black and the second in Brown. I then used each image to create a card.


Monday, 13 May 2013
Birthday Cards
A friend recently had her 40th Birthday and I wanted to make a special card. In the end I used a stamp from Imagination Crafts.

I stamped the image onto white tissue paper and then scrunched it up (this did not feel like a good thing to be doing - but I did it). I then flattened out the image and cut a piece of white paper to go behind the image. I covered the paper with photo clue and added my tissue paper, after drying with my heat gun I inked the edges with the 'Dusty Concord' distress inks.
The card was finished off with a Happy Birthday sentiment (from Stampin Up) cut with the Window Punch. I also used the Stampin Up Butterfly punch and added a bit of bling & the number 40.
While I had this stamp out I decided to use it again to create a second card...
This time I used gold embossing powder, the edge of the image was inked with 'Rusty Hinge' distressing ink and each of the butterflies was given a hint of colour using 'Stormy Sky' and 'Fired Brick'.

I was really pleased with both cards, and really must remember to use this stamp again.
Tuesday, 7 May 2013
National Scrapbook Day 2013
Saturday seems a very long time away now, and it is only Tuesday! However I did promise to include some pictures of our National Scrapbooking Day crop on 4th May, so here goes...
First of all I must say that the SkelliScrapers had set ourselves a challenge - Create a A-Z album (6x6) for any topic of your choice.
Preparation could be done before 4 May, but you could not assemble any pages in advance. You had from the 4th May to 18 May to complete your album. Each of us paid £1 to take part and on Saturday 18 May all albums would be judged (at another groups crop) and the winner would get the prize money.
The challenge was set back in Feb/March so we had plenty of time for planning - I had decided that I would create a A-Z of ME.
My planning consisted on creating a A4 folder with a sheet for each letter, working out what each letter would stand for and what I wanted to include in the journalling. For each letter I had printed out the journalling and cut it to shape (using my Labels 7 die set), cut out the letters required using a 'Go Kreate' alphabet die. I also sorted out what background paper I wanted to use, printed any photos, cut any matts & sorted out what embellishments to use.
The good news with this album is that I have been able to use 6x6 paper pads I already had sitting on the shelf along with odd scraps - in total I only used about 4 x A4 pieces of card stock :)
All I had to do on the day was to pull everything together. Despite this I was not expecting to have completed all 26 layouts in 6 hours - after all that would mean approx 1 layout every 14 minutes!!!
Here are a few photos taken on the day:
 |
| Organisation in action - This is the page for 'F' my Title letters, journalling, photos, matts and embellishments are all in the money bag for safe keeping. |
 |
| Naomi, Ann & Sue F |
 |
| Sue H & Emma |
 |
| YES, I managed to complete all 26 layouts - and we stopped for a lunch break! |
I will be taking photos of the 12x12 pages, I have not got around to it yet, but I will post them here once I have.
Saturday, 4 May 2013
National Scrapbook Day
It is finally here, and I am going to be scrapping all day!!!!!
Photos will be posted during the weekend - Happy Scrapping :)
Photos will be posted during the weekend - Happy Scrapping :)
Thursday, 2 May 2013
Organising my Stampin Up stamp sets
I am normally an organised person, this being the case I have tried several ways of storing my clear stamps and up to now had them in A5 poly pockets in a box. But this was not really working as I could not see them, even after I created a 'Stamp Catalogue' I would forget to look at it or update it when I got new stamps.
So when I saw this video from Dawns Stamping Studio (click HERE), about storing the Stampin Up stamps, I started thinking (you could probably smell the smoke from where you are)... I could use the same idea for my other stamps (or the ones I use the most).
Here is the box from the Papillon Potpourri stamp set...
I hope this is useful and I will let you know how I get on with this method of storing my stamps over time.
Happy Crafting.
So when I saw this video from Dawns Stamping Studio (click HERE), about storing the Stampin Up stamps, I started thinking (you could probably smell the smoke from where you are)... I could use the same idea for my other stamps (or the ones I use the most).
Here is the box from the Papillon Potpourri stamp set...
 |
| The 'image' of the stamp is stuck to the outside of the case, so that when the stamps are put away they each sit over their image. |
 |
| This also means that when you remove a stamp it is easy to see where it goes back again. |
Happy Crafting.
Subscribe to:
Comments (Atom)